I am so excited that I finally have a fall craft under my belt for this year. There is something about doing crafts, and especially crafts for holidays, that warms my heart. I know everyone does wreaths for any and all occasions, and I wanted to have a second wreath for this season. Most people use things like yarn, burlap, flowers, leaves, sheet music, etc. I wanted something different, something with a ton of texture. Insert wine corks!

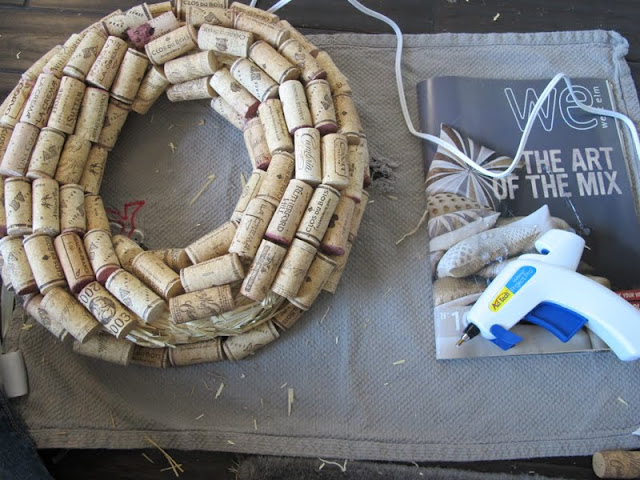
For this wreath I kept it simple. I used a massive bag of used wine corks, hot glue, and a fall floral set. My wreath itself was made out of hay, which was perfect because the spots that the corks didn’t match up perfectly simply had hay show through. A fun harvest touch:)
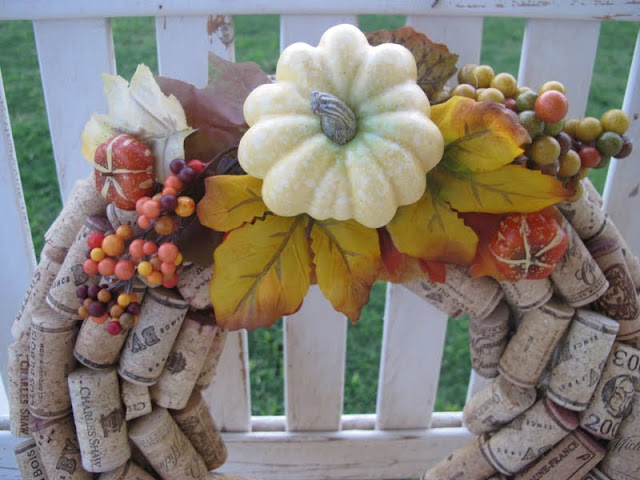
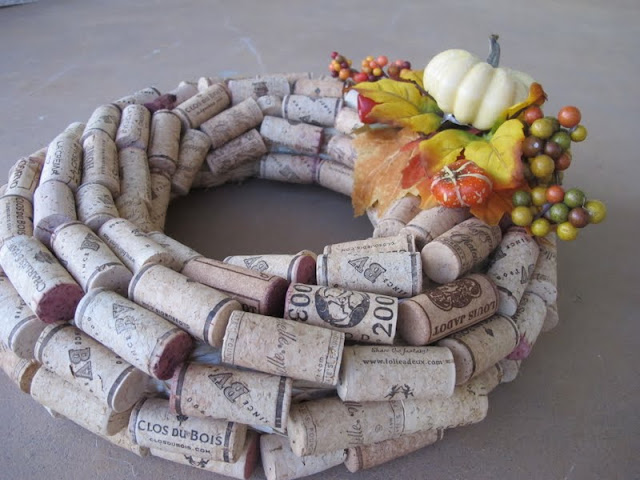
I didn’t count the amount of corks I used, but it was a lot. And no, they weren’t all ours. We love our wine, but not that much! I am loving how the wreath ended up turning out. It has so much texture, is simple, and has a great fall feel!
It will most likely end up hanging on our front door, but yesterday I was simply out of time to go into the garage and get the ugly wreath hanger thing. How come there are not better looking ones out there?!
So what do you think? Like, love, hate? I myself am a fan. I also am a fan that today is Friday! Hooray for an exciting weekend ahead! Happy Friday!

I have always wanted to make a project with corks. I started my collection months ago 🙂 I love your blog, so inspiring!
I like!! I like the natural color and texture the corks adds. Very charming!!
So cute! I might have to make one myself out of the giant bag of corks we were saving for a project I’ve now lost interest in 🙂
If you have a metal door, they have wreath hangers that are magnets. They work well for heavy0sh wreaths.
If you want to hang it higher on the door, you might try a Command Hook. I use one of those to hang a wreath above the sitting area on my front porch.
I love wine cork projects and this one turned out soooo cute! Pefect texture for fall. 🙂
Visiting from BNOTP ~
Heidi @ Show Some Decor
I been saving corks for a couple of years for the perfect project and I have found it!! Thank you so much for blogging this!!
xxoo,
Liberty
libertyoriginal.blogspot.com
I knew I was saving all those corks for a reason. 🙂
Thanks so much,
from your newest follower.
would love if you stopped over.
Karin
http://www.artisbeauty.net
visiting from atoz
I love this, it’s very fall! I just saw one at a winery, they were selling it for $25. You could go into business! But of course I though “I can make that myself” Now I just have to start drinking 🙂
I’m stopping by from the Type A, Anything Goes party and I have to say: I am jsut smitten with this wreath! Super cute!
lifewiththehawleys.blogspot.com
wow! why did I throw all the corcs away!? such a nice idea. I live in the wine country- it would fit so perfectly to all the wine- yards that we can see out of the window… ok time to drink more wine! thank u for the inspiration
Fun & festive! It’ll go great on your door too. 🙂 I would love for you to link it up to my door decor fall craft challenge:
http://oneartmama.blogspot.com/2011/09/falling-for-crafts-challenge-3-door.html
Featuring YOU over on my blog this morning. Love your wreath! 🙂 Thanks for sharing at my {wow me} wednesday party last week.
Ginger @ gingersnapcrafts.com
http://www.gingersnapcrafts.com/2011/09/take-look-at-you-wreaths.html
Super cute idea! I would love to feature this on Reduce, Reuse, Upcycle. Your feature will go live Tues. (10-4)Feel free to stop by and grab a featured button. Thanks!