
A few weeks back J came across this great old drafting table that is from New York {or so the guy who sold it said}.

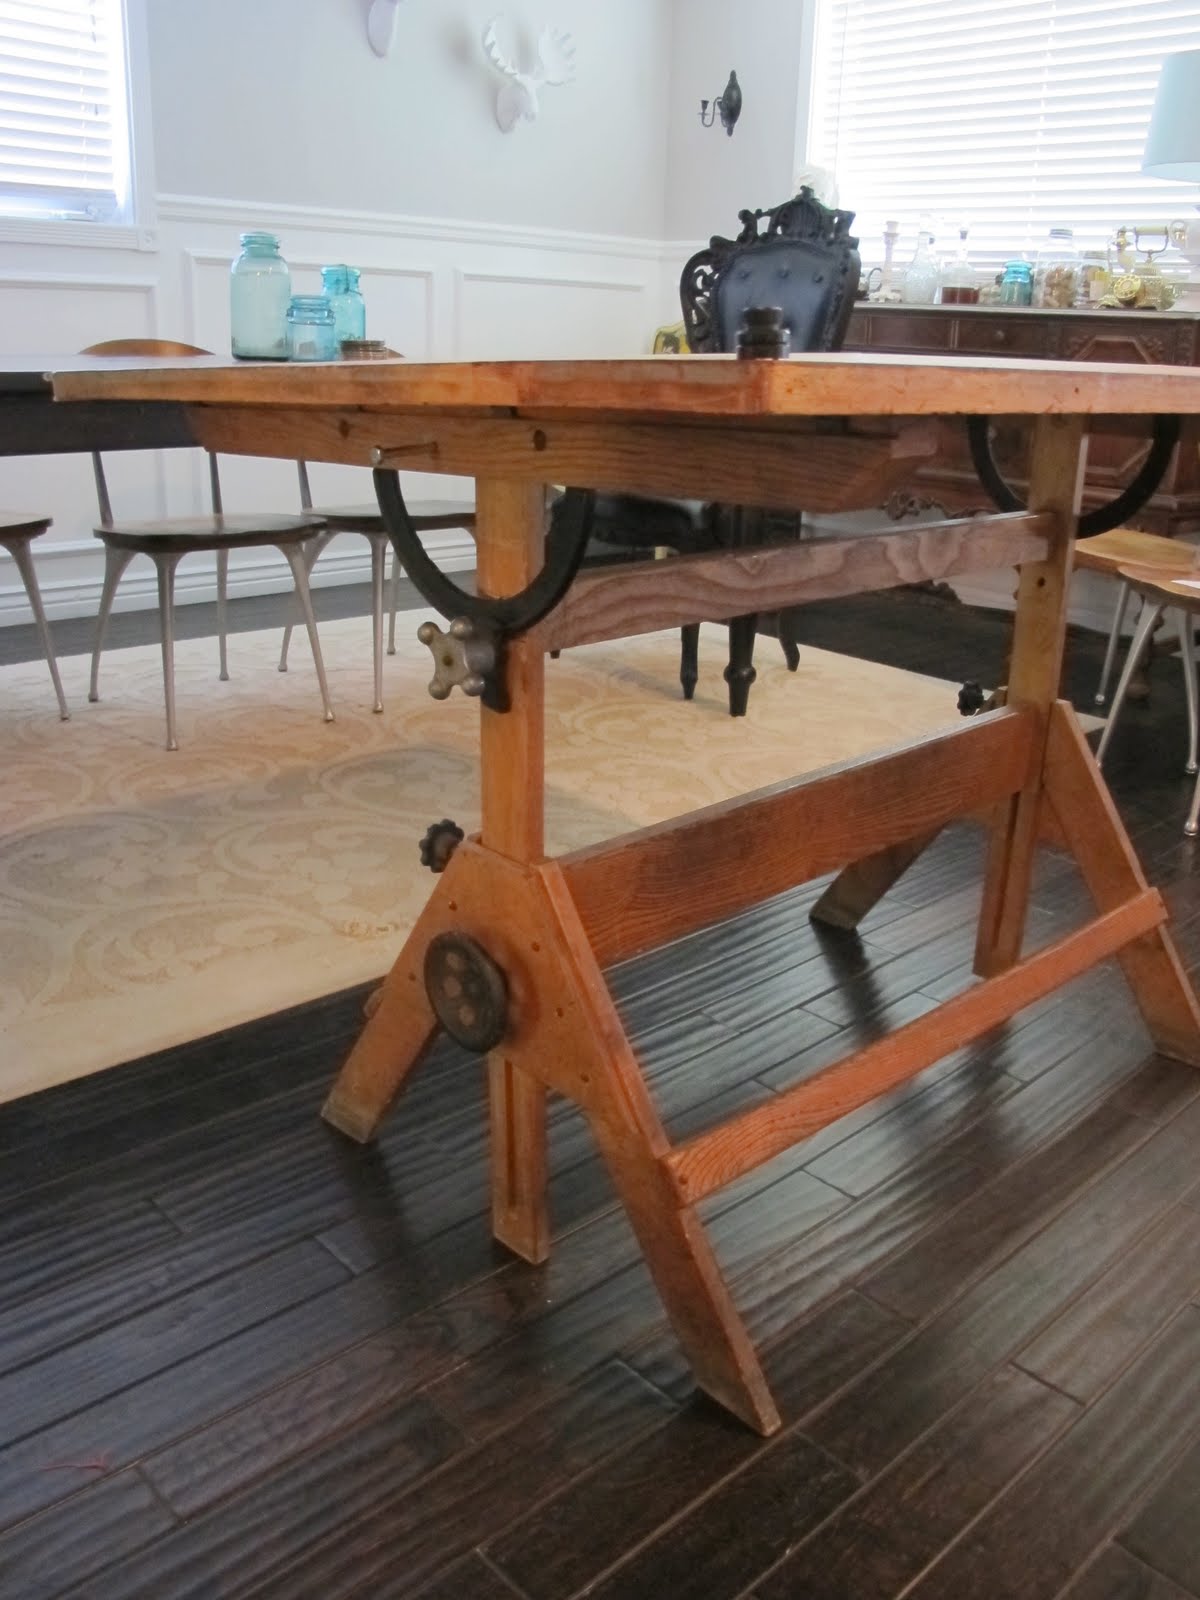
It was super cheap so we figured we would probably just resell it. But then J had a great idea that was a little risky… we could alter the drafting table to make a new dining room table! We have been contemplating getting a new dining room table for a couple months, and even searched around plenty for dining chairs and table for sale. We did see some beautiful options, but haven’t found one we love yet, so when J said we could make one I thought it would be fun. Our plan was to try to merge a farmhouse style table with a drafting table base. Here is how we did it.
- We took ourselves down to HD to buy some wood and supplies:
- 9 – 2″x6″X8′ boards
- L brackets
- Screws
- Jig for screwing boards into each other
 |
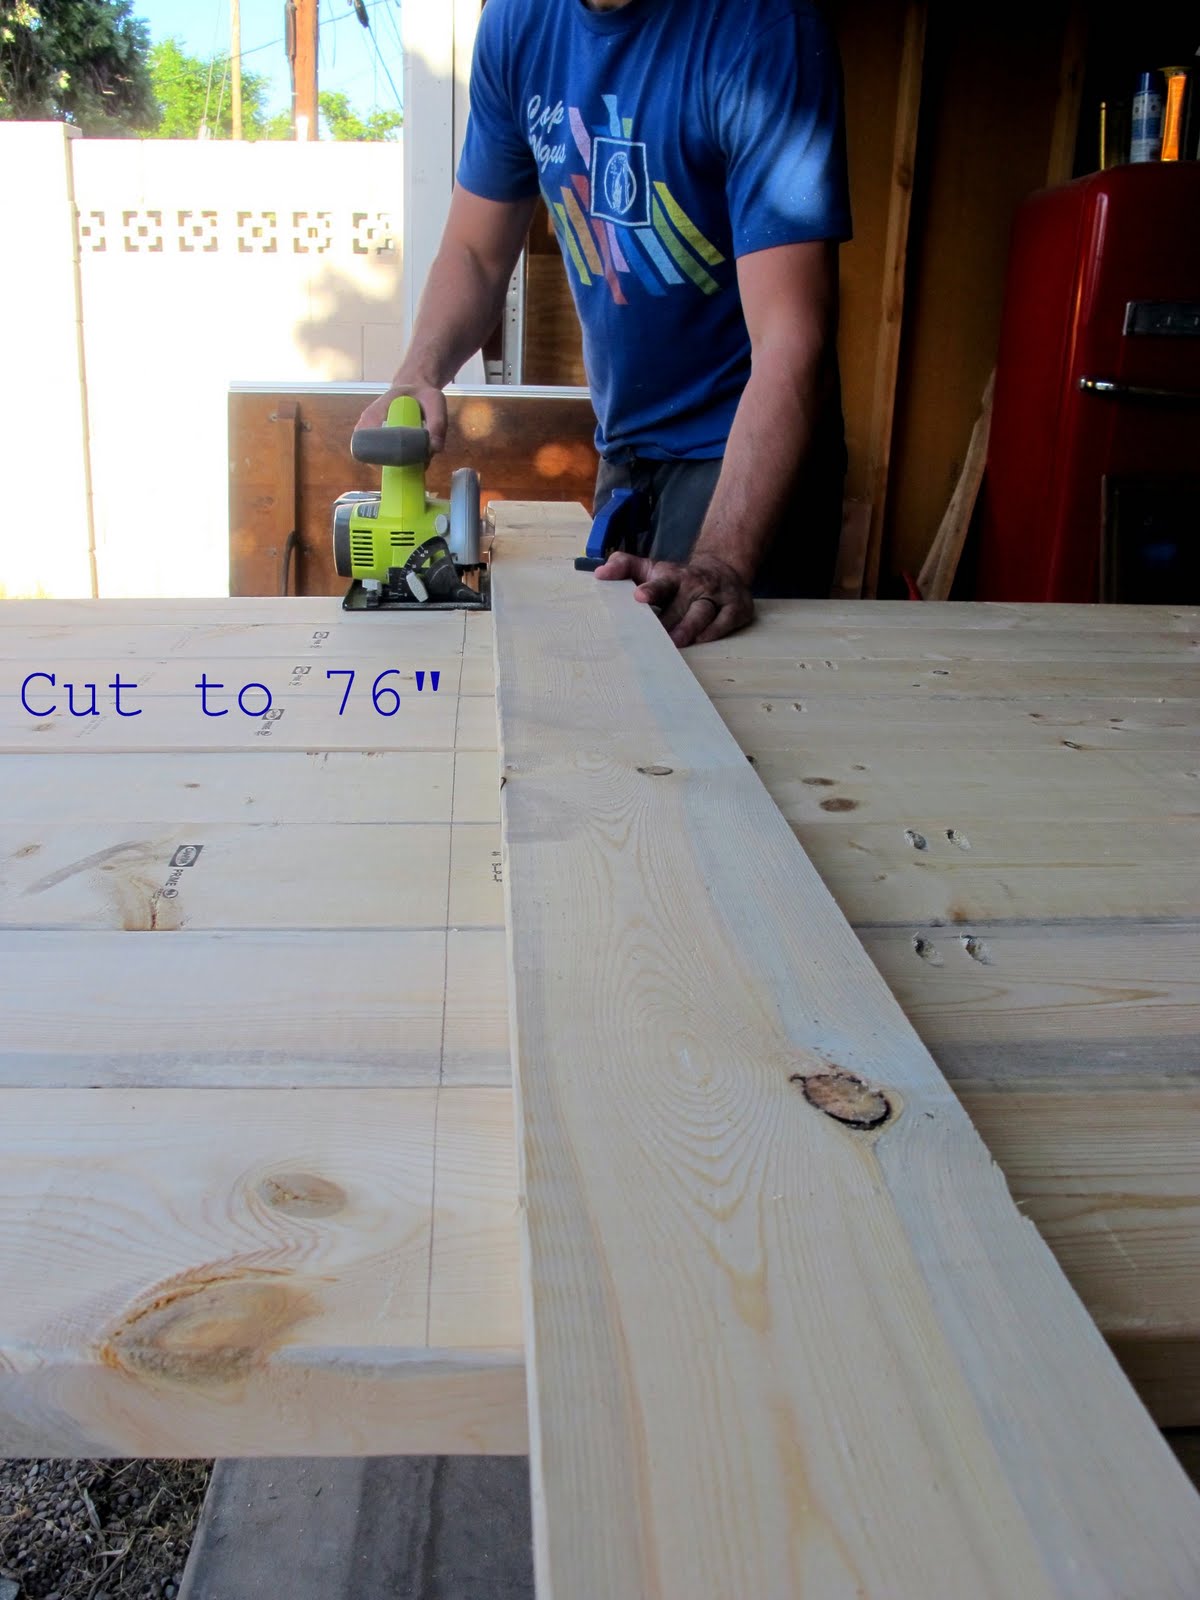
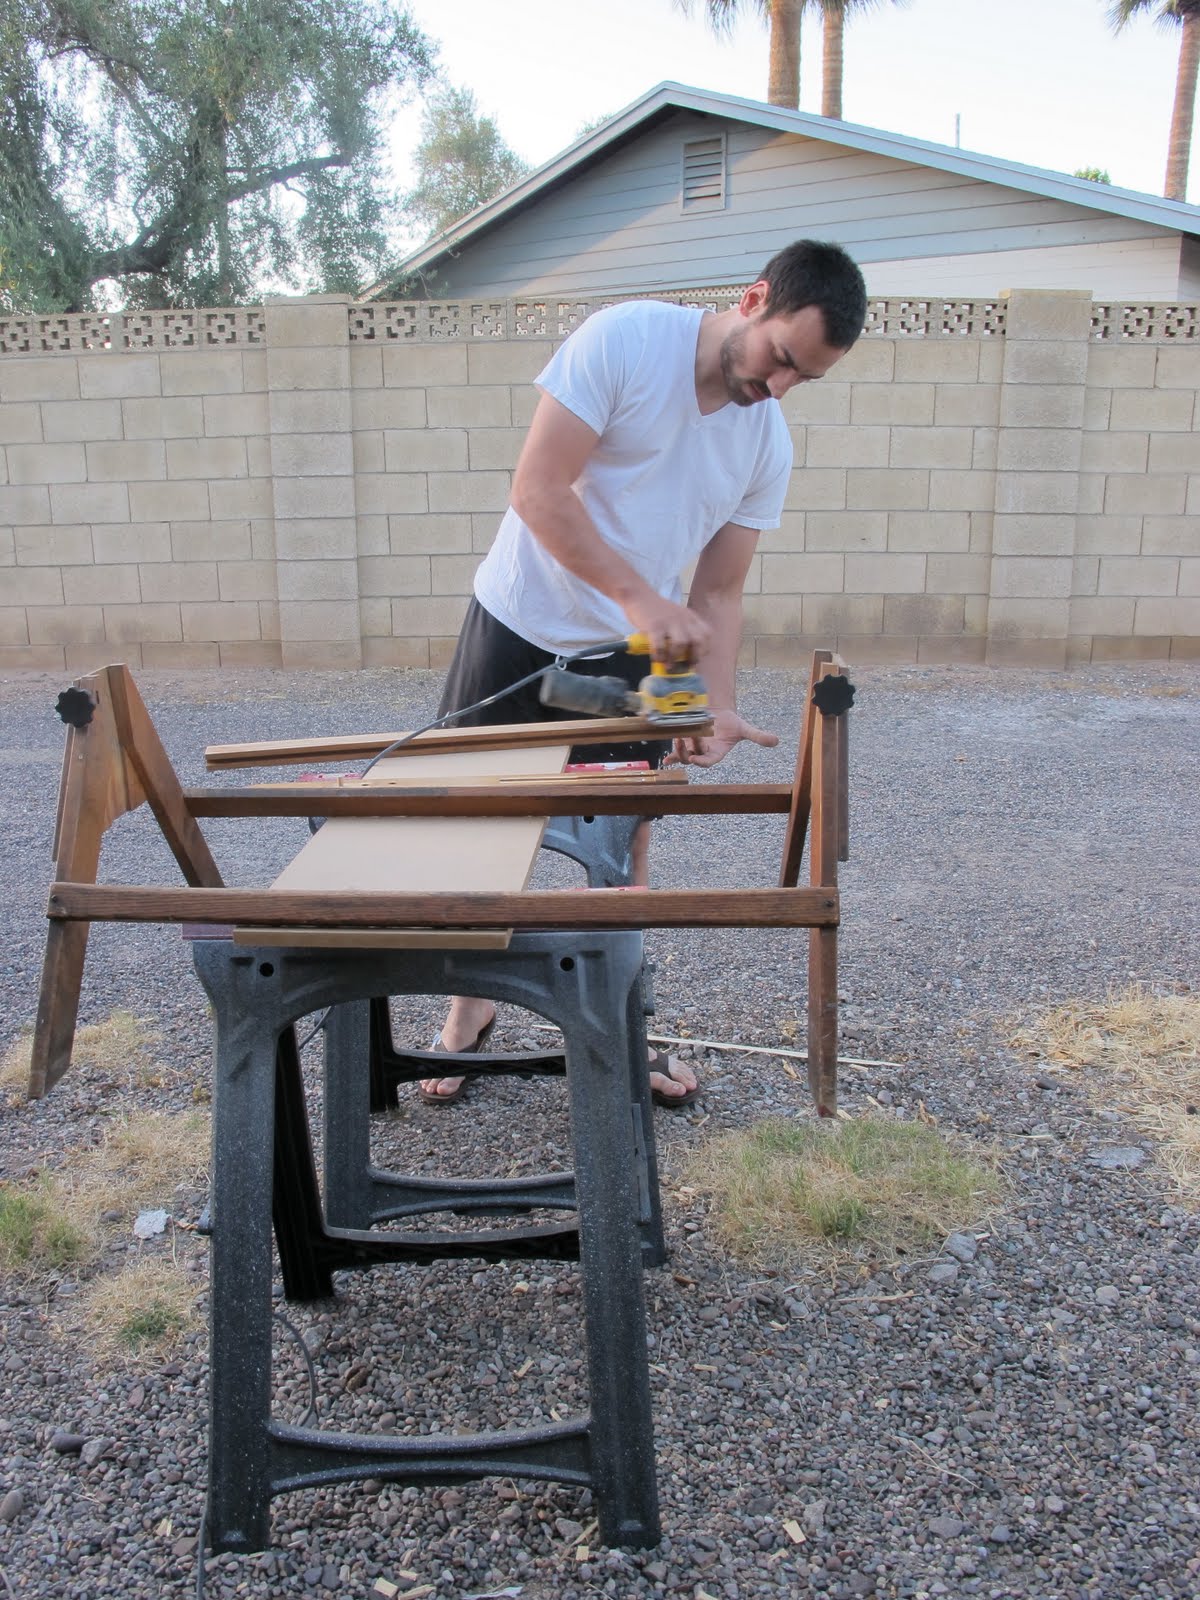
| J making sure the board is straight. You want to make sure and get super straight boards. And/or super straight husbands. I choose both. |
- Next step was to lay out the boards. We were going for a table that was 44″ wide by 76″ L {We will cut the boards to the desired length later}.

- Using the jig screw the boards together one by one. Use a clamp to ensure the boards are level with each other. Ideally you would want to use a clamp that could span longer than 36″, but a 36″ clamp is all we had.

 |
| Gooo ASU. NOT. Jk- thats where we both went, and J currently is getting his MBA at, so GOOO ASU. |
- Once the boards are screwed together we cut them down to 76″.
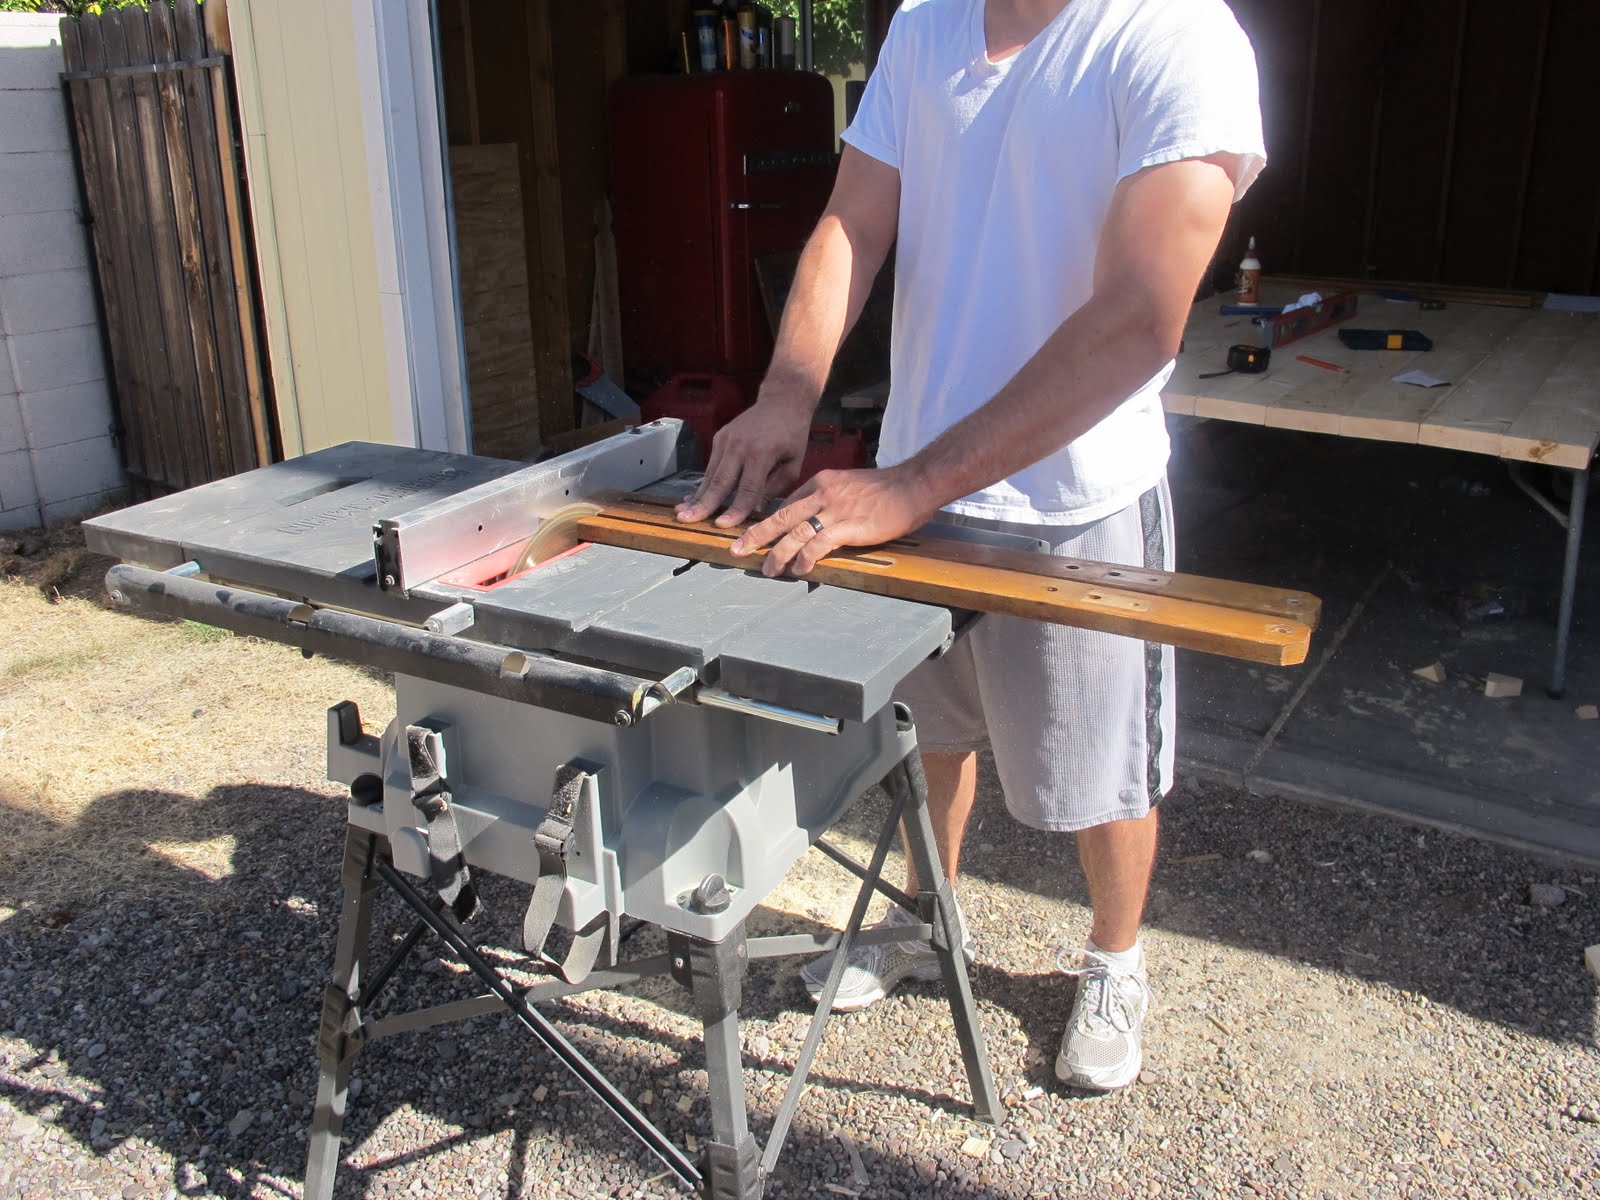
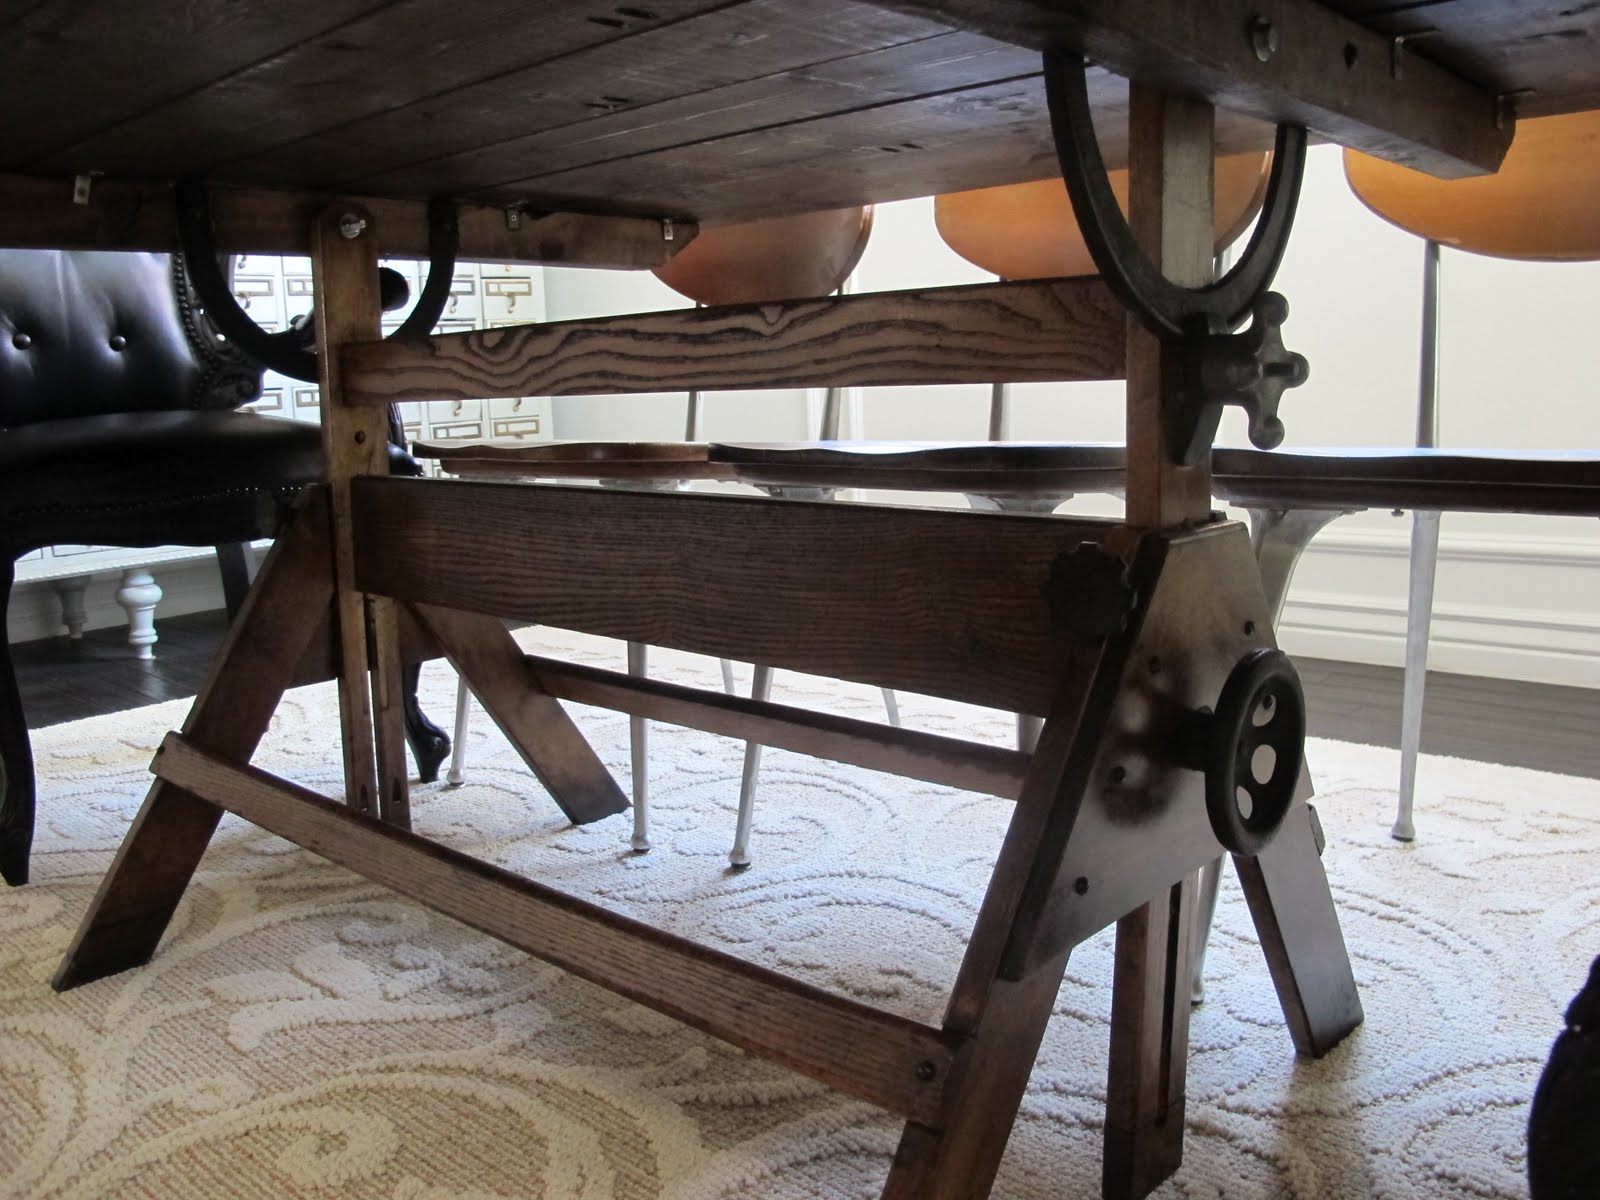
- Now it was time to make the braces that would add stability to the table while connecting it to the base. We copied the measurements from the existing top of the drafting table and attached similar braces to our table top. We attached the braces using glue and L brackets.

- Using a chisel we chiseled out sections for the semi-circle metal pieces to sit flush with the brace. We then connected these pieces to the braces by drilling holes and using the original nuts and bolts from the drafting table. However, one of our friends recommended that we also purchased some lock nuts to ensure that all of the nuts and bolts stay in place for longer. Apparently, lock nuts prevent the nuts and bolts from loosening with all of the use that the table is likely to have. Hopefully, they will add some extra security for the table, ensuring that it all stays in place.

- Next we had to alter the base a bit. Originally the base would only lower to around 34″ but a normal dining table sits at 30″ so we had to cut a section out. If you look at the base you can see that there is a slit in the vertical piece of wood that straddles one of the support bars. We removed the bottom of this piece and cut a 5″ section out of it and carried the slit up another 5″ so that table could now be lower to 28″ {even though we secure it at 30″}. Again using the Jig and glue we reattached the bottom of the piece of wood that we removed to finish the base.
- The next step was to attach the base to the table top. This took a few adjustments for the bolts, but overall worked out relatively easily.
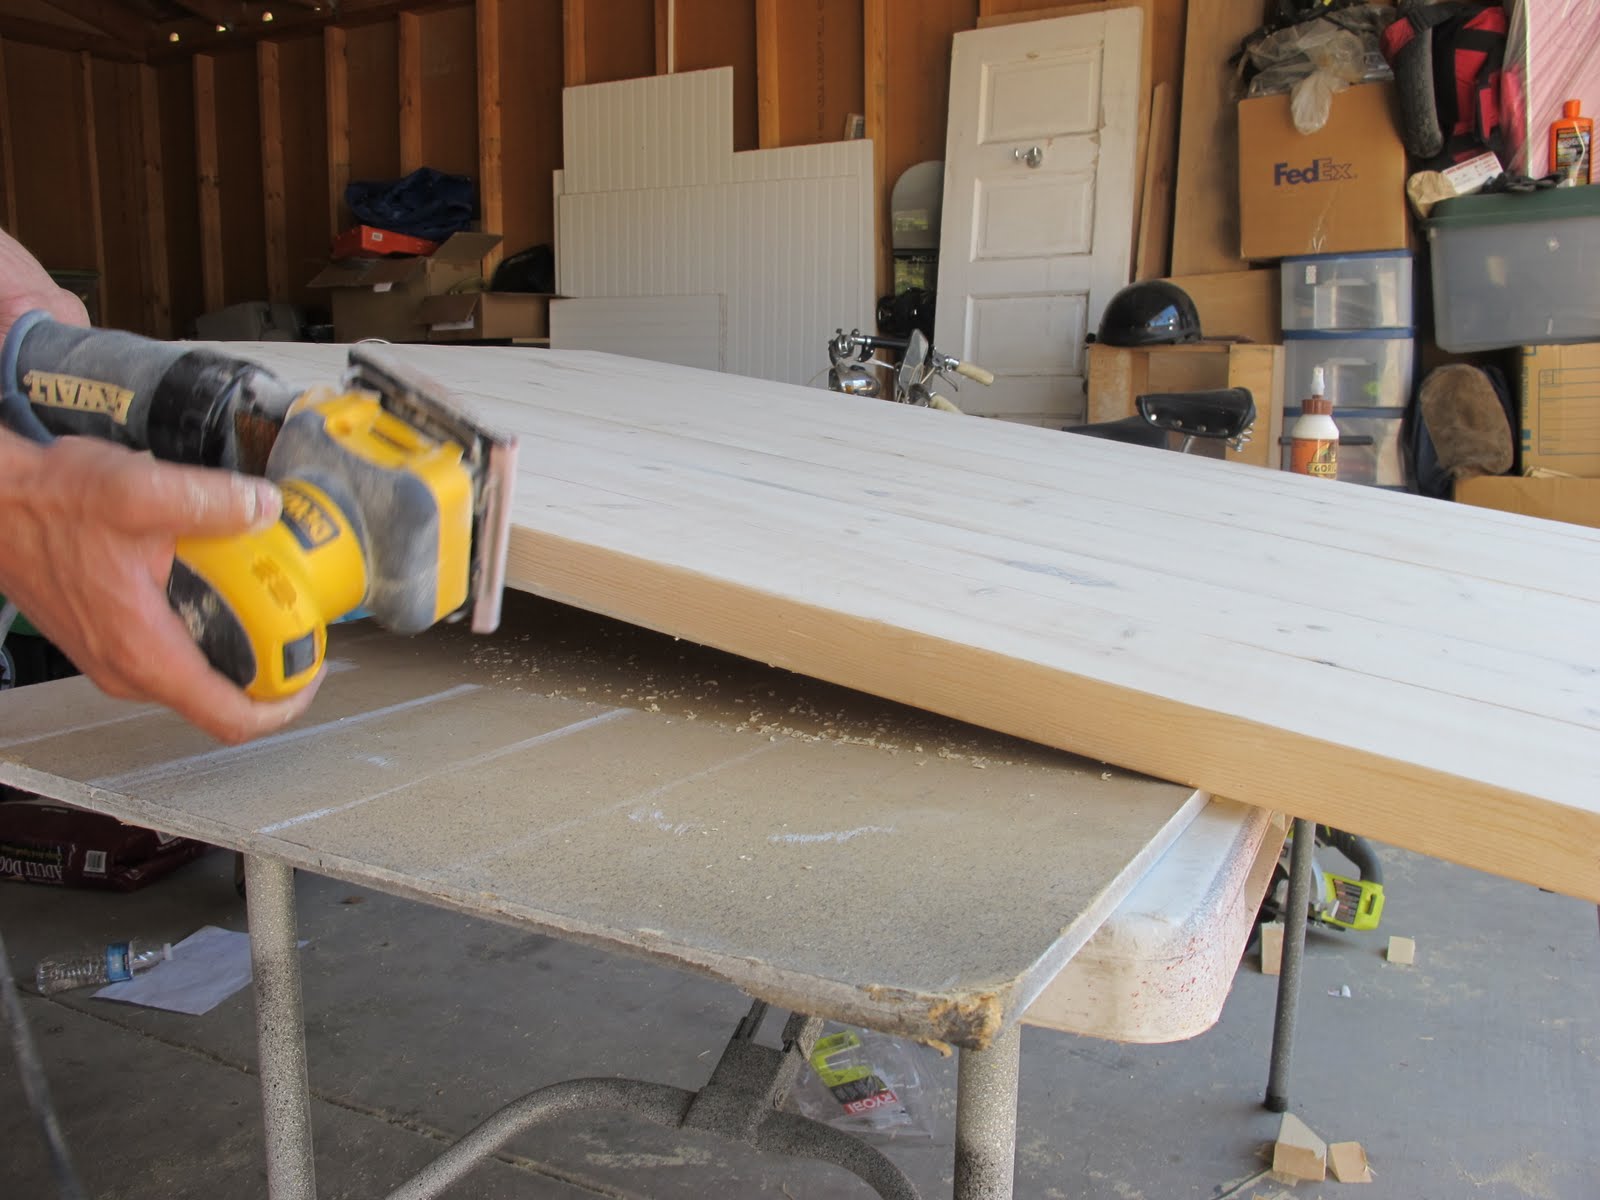
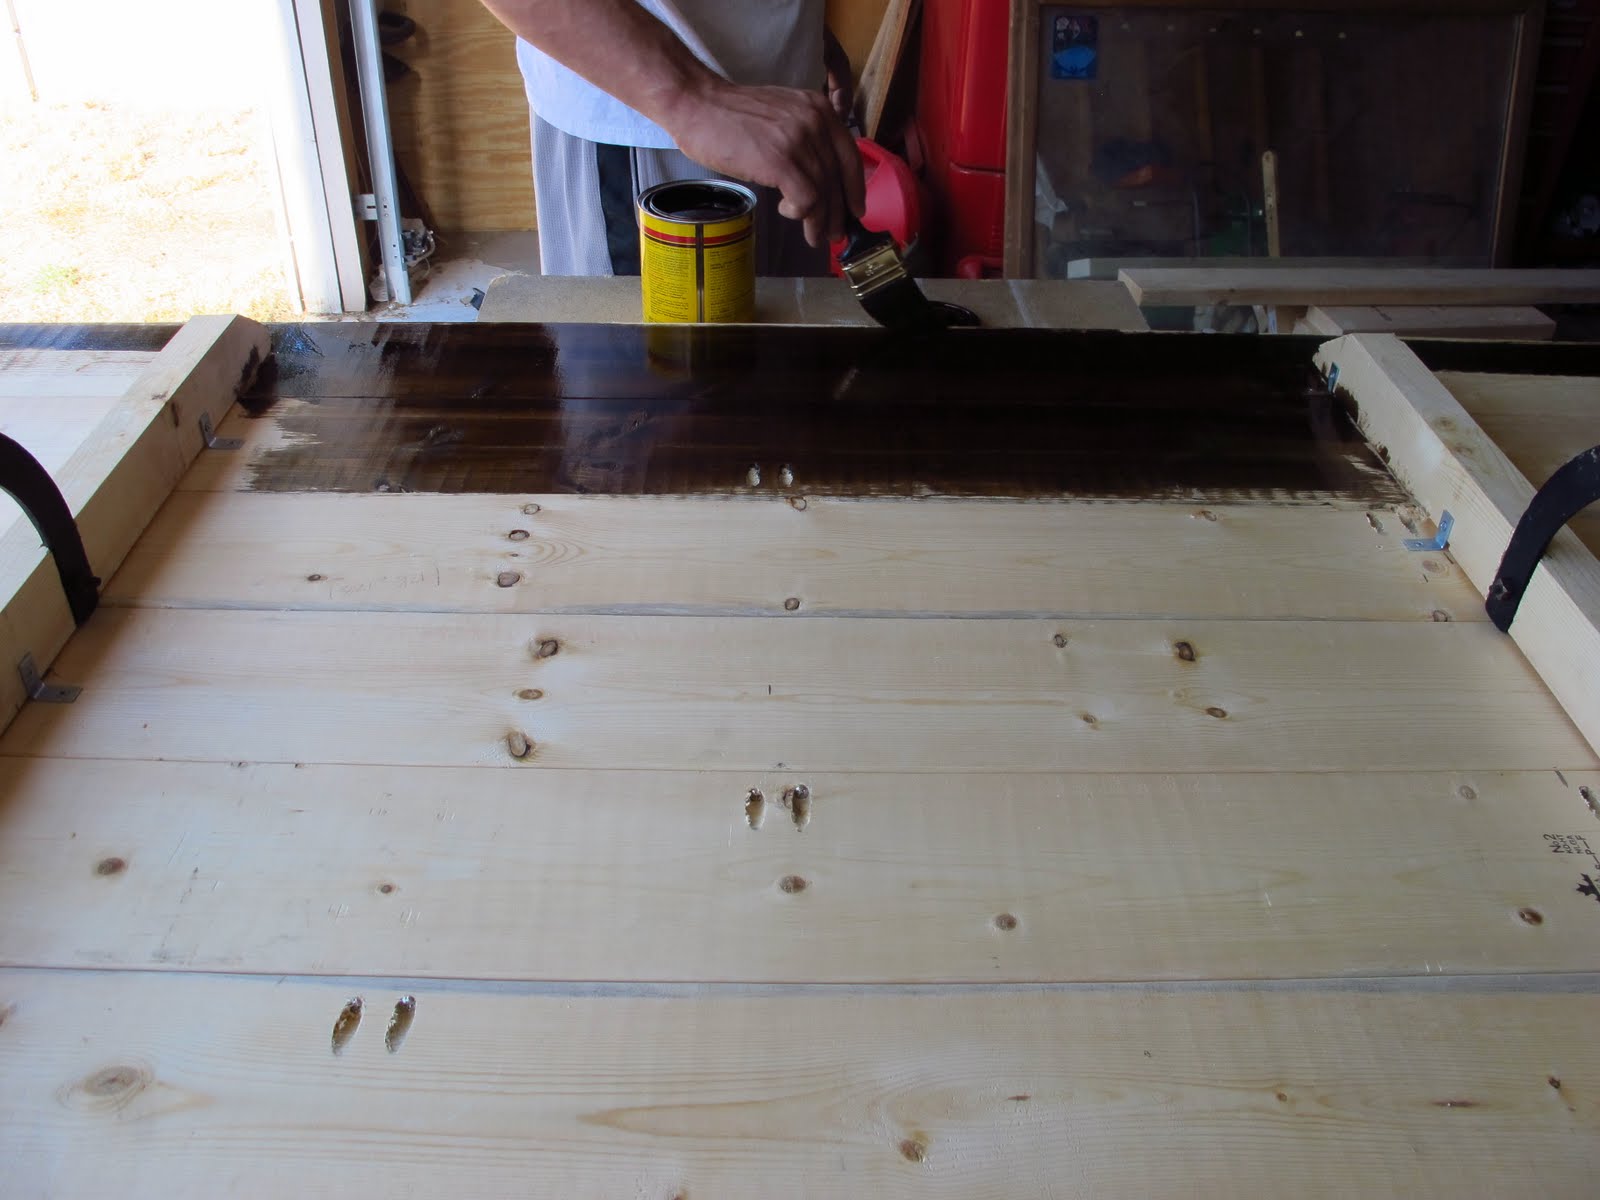
- Once the table was built it was time to distress and stain it. To distress the table and make it look old, we beat the effing crap out of it with hammers, chisels, screws, and screwdrivers. We added dings and sanded corners to give the wood a weathered look. {sorry no photos, we got a little carried away with the ‘beating up’ portion of the project}
- For the stain we chose to use Minwax Dark Walnut. We started by dissembling all the pieces of the table and sanding everything down. Then applied the stain to the bottom side of the table to test out the stain. Once we figured out what tone we were going for, we applied the stain to the table top and the base. Once the stain had soaked in, and all the pieces had been wiped down, we sealed the table and base using Minwax Wipe-On Poly. We did 2 coats on the base and probably 5 coats on the table top, since this will get more wear, thus needing more protection. After a few coats we wet sanded the table with fine sand paper and applied a new coat of poly. After 5 coats we felt it would hold up and have a nice shine.

- Next we assembled the table and moved it into our dining room to sit atop our super ugly rug {its weird how we loved this rug when we bought it, but since then the dogs have chewed, and we have repainted, and so now we HATE it… so no judging allowed- we totally know it does NOT go!}


We loved the industrial and farmhouse feel of this table and love even more that we built it. We know that some people will think that we ruined a perfectly good drafting table to make this dining room table, but we love it. Also, since we didn’t alter the drafting table top, we can always take our table apart and the drafting table is still compatible… so we didn’t ruin it {I know I am already getting defensive for some future comments}. We think the table is super original and fun and goes well with our unique home. What do you think?
<3,

PS- I linked this to my favorite parties!

REALLY? You guys are amazing. It looks awesome! I love the idea. My father is an architect and I am going to be showing him this table. So well done and it fits perfectly with your house. Wow!
my parents have one just like that they use in their kitchen and i just love it! i think they make such awesome rustic dining tables. very cool!
An incredible transformation which fits in perfectly with your decor. I love the look of the table – it has so much more character now. Thank you so much for sharing!
http://www.lminteriorsllc.blogspot.com
Who could possibly say anything negative about this? It’s gorgeous! Love the base and the color you stained the top. Just perfect, in my opinion.
I love it. Why not “ruin” something if you love what you make with it even more!!!
My husband and I made our dining table, and it makes me happy every time I eat at it.
That is SO original and BEAUTIFUL!! I love it, you guys are amazing!!
Trish
tdadecoratinganddesign.blogspot.com
I absolutely love your new table! Now, can you make me a new table? 😉
“You want to make sure and get super straight boards. And/or super straight husbands. I choose both.” Bwaahahahahha, I love it!
And the table looks fantastic!!
AMAZING!!!!!
Love it!
That table is gorgeous!! You guys make a perfect team!
TO.DIE.FOR! Really gorgeous! Can you guys pls stop by Kansas City and whip one up for me? You make it look so easy! 🙂
You guys are fabulous! I would love to attempt to make a table like that!! Thanks for sharing!
Love it. There’s no shame in using something old in a new way–fantastic job!
Wow- thank you guys SO much! I am so glad the table has been loved by all so far! We were kinda afraid there would be haters {not that it ever changes our mind as to what we do for projects!}. Sarah- Haha, thats funny, right?!?
Erin- well I do have a best girlfriend out in KC, so you never know:)
<3,
Adri
Interesting idea…just bought one of those recently, and did not think of doing something like this.
I probably won’t, but it has gotten my mind percolating…
Steve
Neat-o! Beautiful job. You’ve got quite an eclectic room going on there, and I like it! Everything has a story.
That is completely AWESOME (and I don’t use that word often). It is completely unique, and I think you’ll get a lot more use out of it as a dining table than a drafting table!
Really amazing and fits in so well to the space! Take care, Laura
I ADORE this! and I WANT those black chairs….awesomeness!!!
I just featured your table. I love it!http://jandjhome.blogspot.com/2011/06/so-much-to-love.html
Stunning! My husband and I plan to make our own table. This is a great inspiration!
How do you guys always just happen to find such amazing stuff? Either you truly are blessed, or the Arizona market isn’t quite as flooded with people with the same taste as the California one is! Luckies!
Wow! It looks amazing!
You’re on apartment therapy re-nest today! http://www.re-nest.com/re-nest/tables-dining-occasional/before-38-after-vintage-drafting-table-turned-dining-table-dream-book-design-148383
So superb! The color of the stain (my personal favorite, too) really brings out the beauty of the knots and wonderful imperfections in the wood … great job! I REALLY want one of these tables!
Great minds think alike! I just bought a drafting table a few weeks ago to do this very same thing!
What a fabulous and original idea! It looks great and unexpected and it works in your home very well, together with your other eclectic furniture! Love your new dining table.
Jessie
http://www.mixandchic.com
absolutely awesome!
Love how it turned out!
I love old wood that has character!
Oh my goodness! You guys are like DIY royalty. Seriously. Love it!
I love love love your table.
MaryAnn
Wow, the table is gorgeous. Great job! Thank you for the detailed how-to. Found you through Miss Mustard Seed..
Wow, wow, wow!!! Cute and clever! Found you through Miss Mustard Seed!
Carol in GA
This room is spectacular! Beautiful job, well done!
Are you kidding me…your table is amazing! The chairs are amazing too! I just love it all and find your post so inspiring and exciting! Thank you for sharing. And thank you to Miss Mustard Seed for sharing your link!
Wowza! Stunning.
~Pam
pamspaintparlor.typepad.com
So creative! I LOVE this table!
I love it, but I love everything you guys do. I loved your old table too. 🙂 P.S. Where’s it going? Want to ship it to me? ;P J/K
One word, WOW!
Hi, I’m your newest follower, great job on the table … :0)
love this project so freaking much! you all knocked it out!
Holy Moly! I can’t even tell you how much I love this! What an amazing table. The underside of it too, wow!
I would LOVE it if you would submit this to my brand new link party starting friday morning!
Once Upon A Weekend Link Party
http://www.familyeverafter.blogspot.com
Wanna know what I think? I think you guys make a FANTASTIC couple! I’ve not seen anything you’ve done that I don’t like! Keep it up…loving each other and building stuff!
this looks so good! I just found an old drafting table and a friend told me about this post. Can you tell me approx. how long it took to make this? Was it a weekend project? 2 weekends?
I’m curious as to why you made a top out of construction grade flatsawn soft wood and stained it, as opposed to using the original hardwood top. Did you just want it bigger or something?
We made a top because the original was way too small to be a dining table (at least for us)
Beautiul! Purchased a drafting table years ago and was going to resell but this has inspired me. Is the table still adjustableheightwise based on the drafting table itself? Thanks.
Hi Bonnie, sorry for the delay- yes, you could still adjust the height!